Embedded Apple Pay— Configuration Guide
This guide provides comprehensive instructions for integrating Apple Pay with EdfaPay via our Embedded (Server-to-Server) solution. Adhering to these steps will facilitate a seamless and successful activation, enabling your business to efficiently process Apple Pay transactions.

1. Apple Developer Account Setup
To commence, an active Apple Developer Account is required.
- Access the Apple Developer Portal and authenticate with your Apple ID.
Prerequisite: A paid Apple Developer Account is mandatory for proceeding with these configurations.
2. Create a Merchant ID
A Merchant ID is fundamental for securely processing Apple Pay transactions.
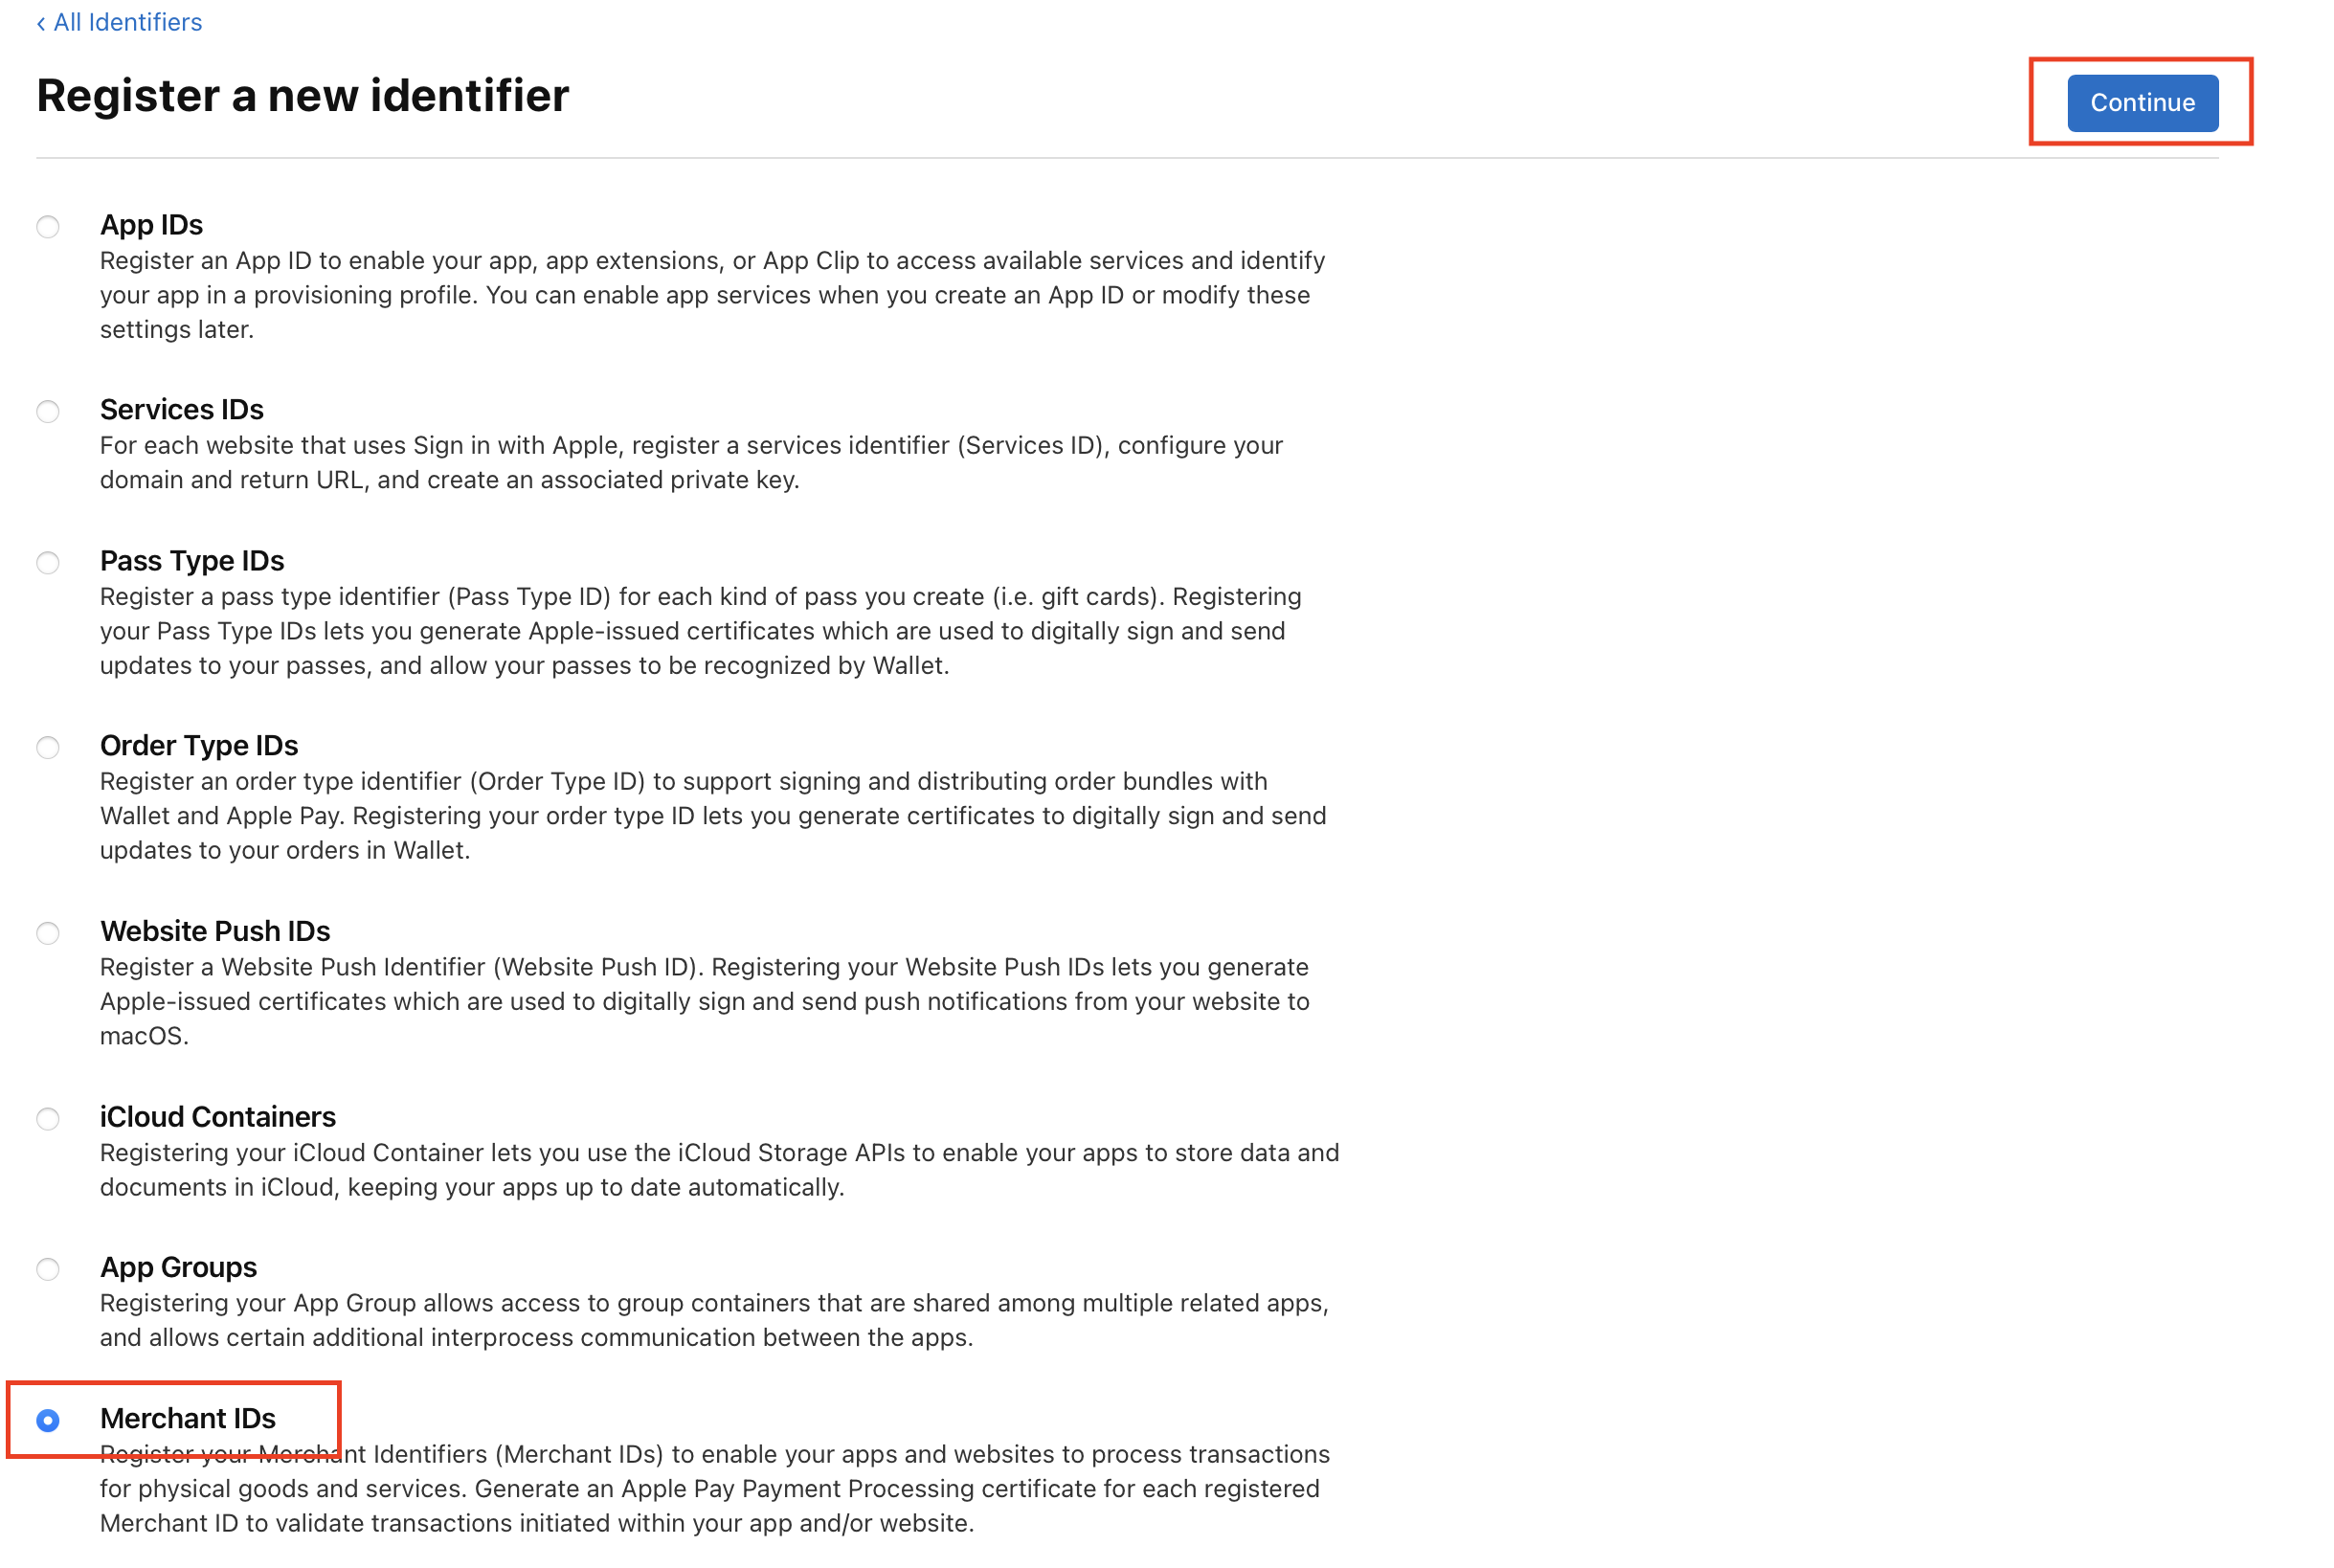
- Within the Certificates, IDs & Profiles section, select Identifiers.
- Click the + button to add a new identifier.

- Select Merchant IDs and click Continue.
- Provide a descriptive name and a unique identifier (e.g.,
merchant.yourcompanyname).
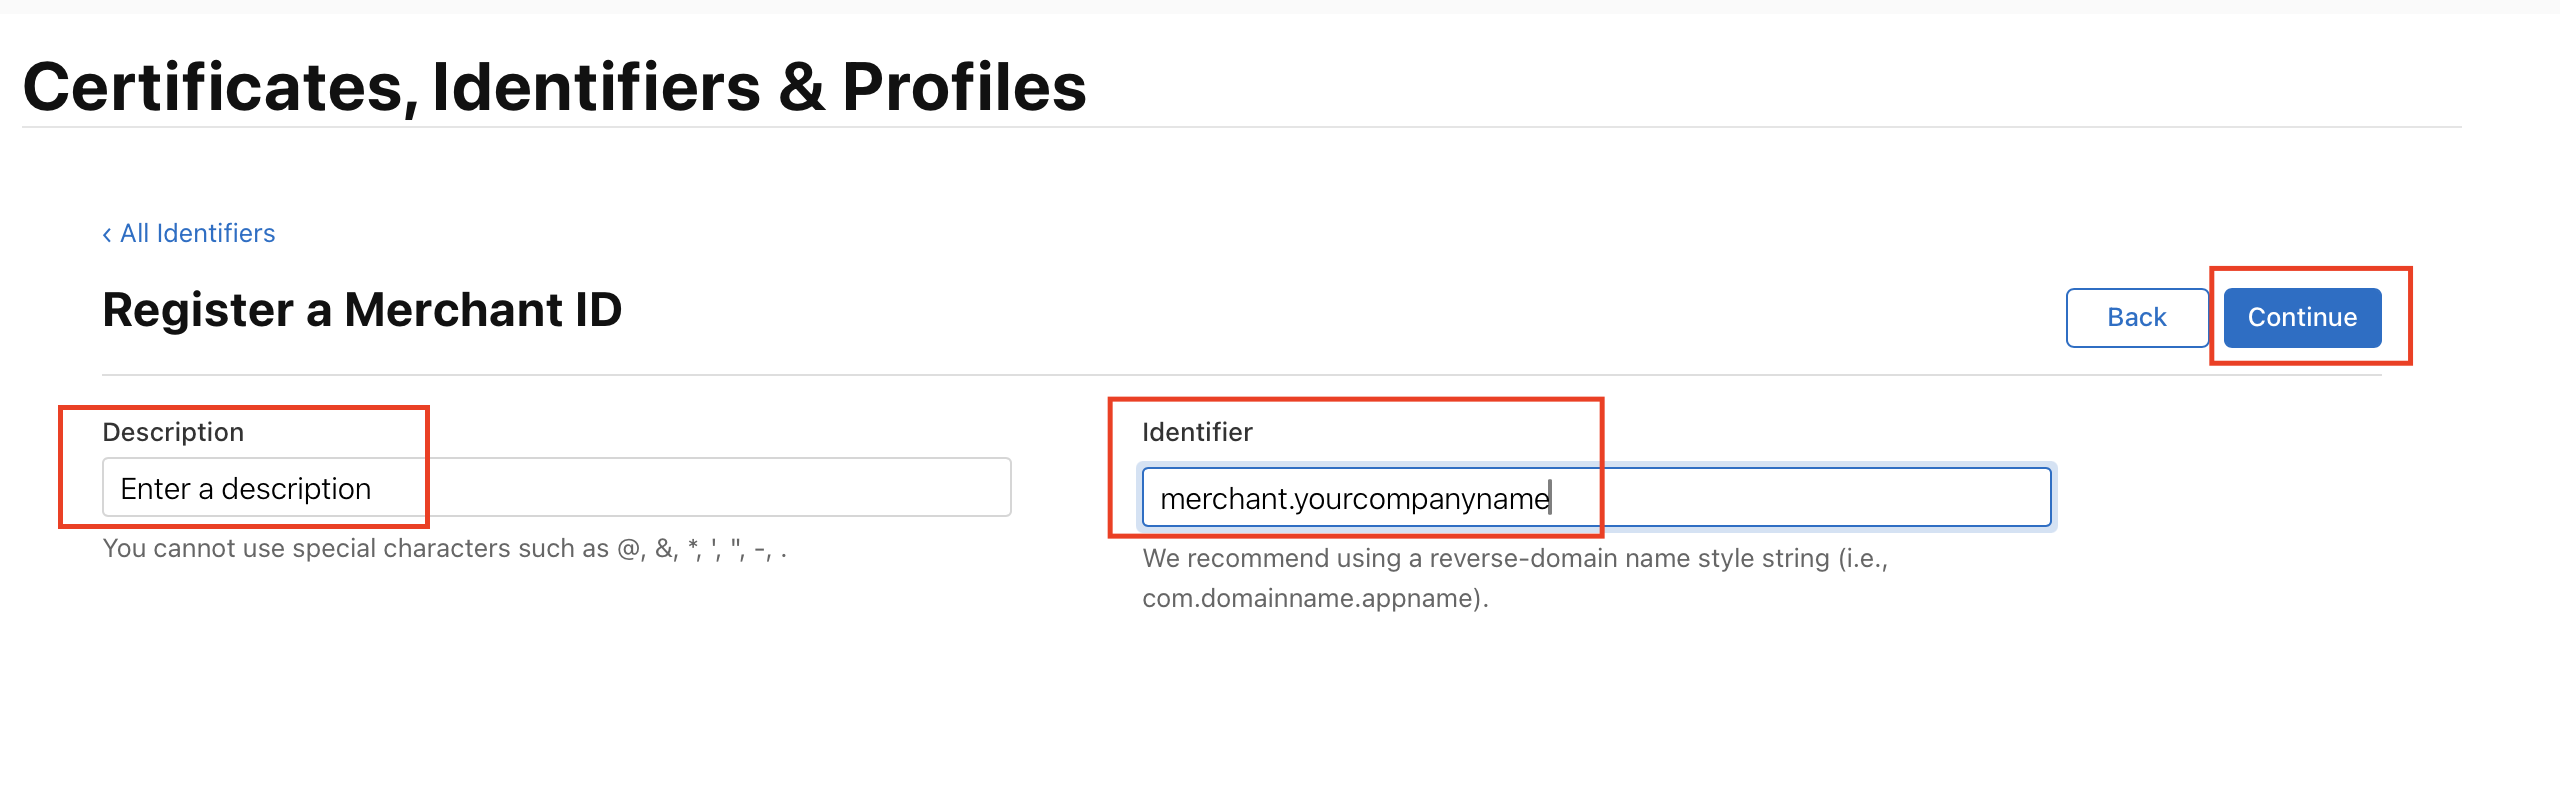
- Click Register to complete the creation process.
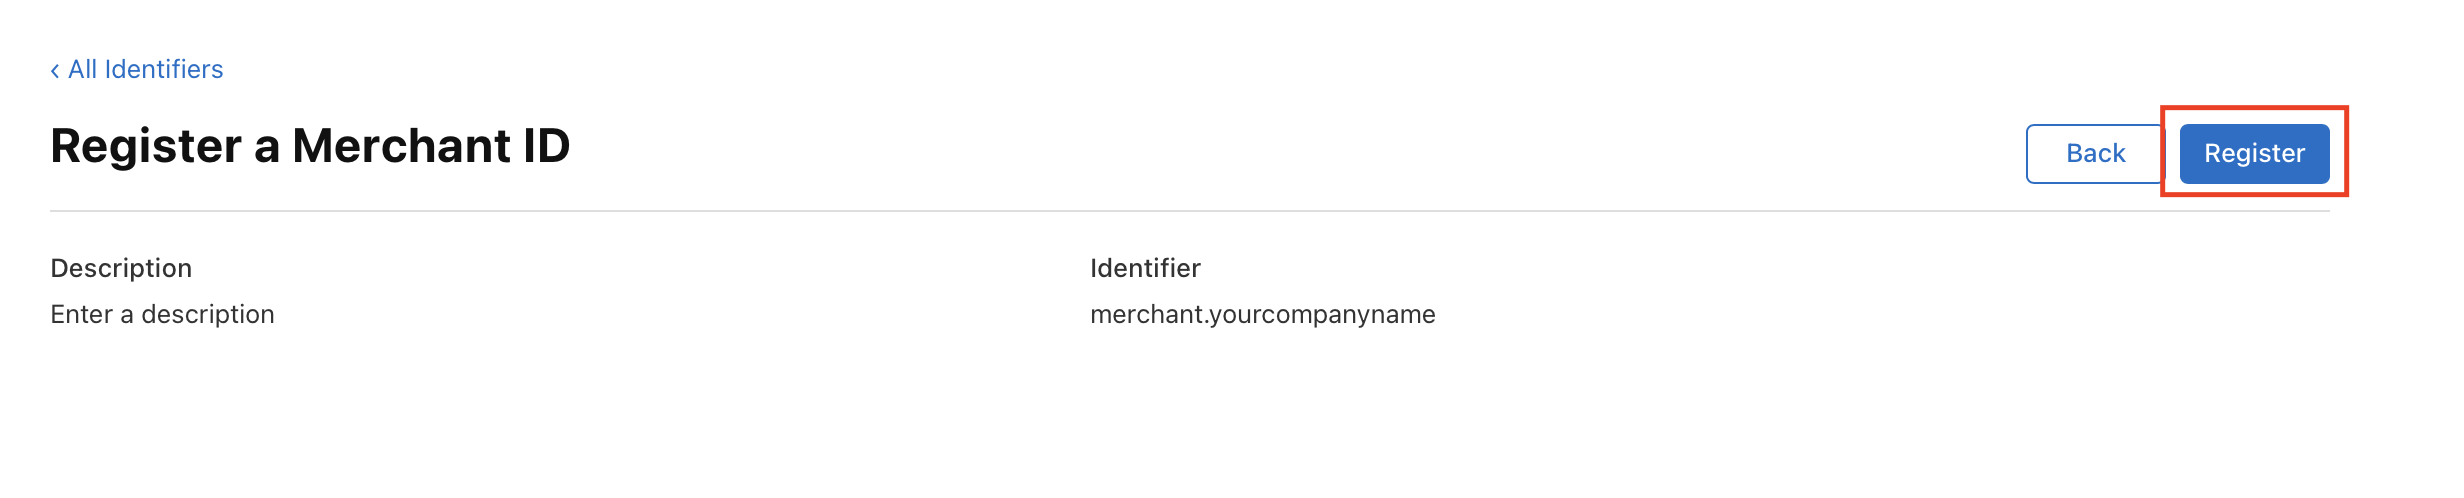
Crucial Alignment: The Merchant ID established here must precisely match the identifier configured within your MPGS and EdfaPay settings.
3. Generate Payment Processing Certificate
This certificate facilitates secure payment processing for your Merchant ID.
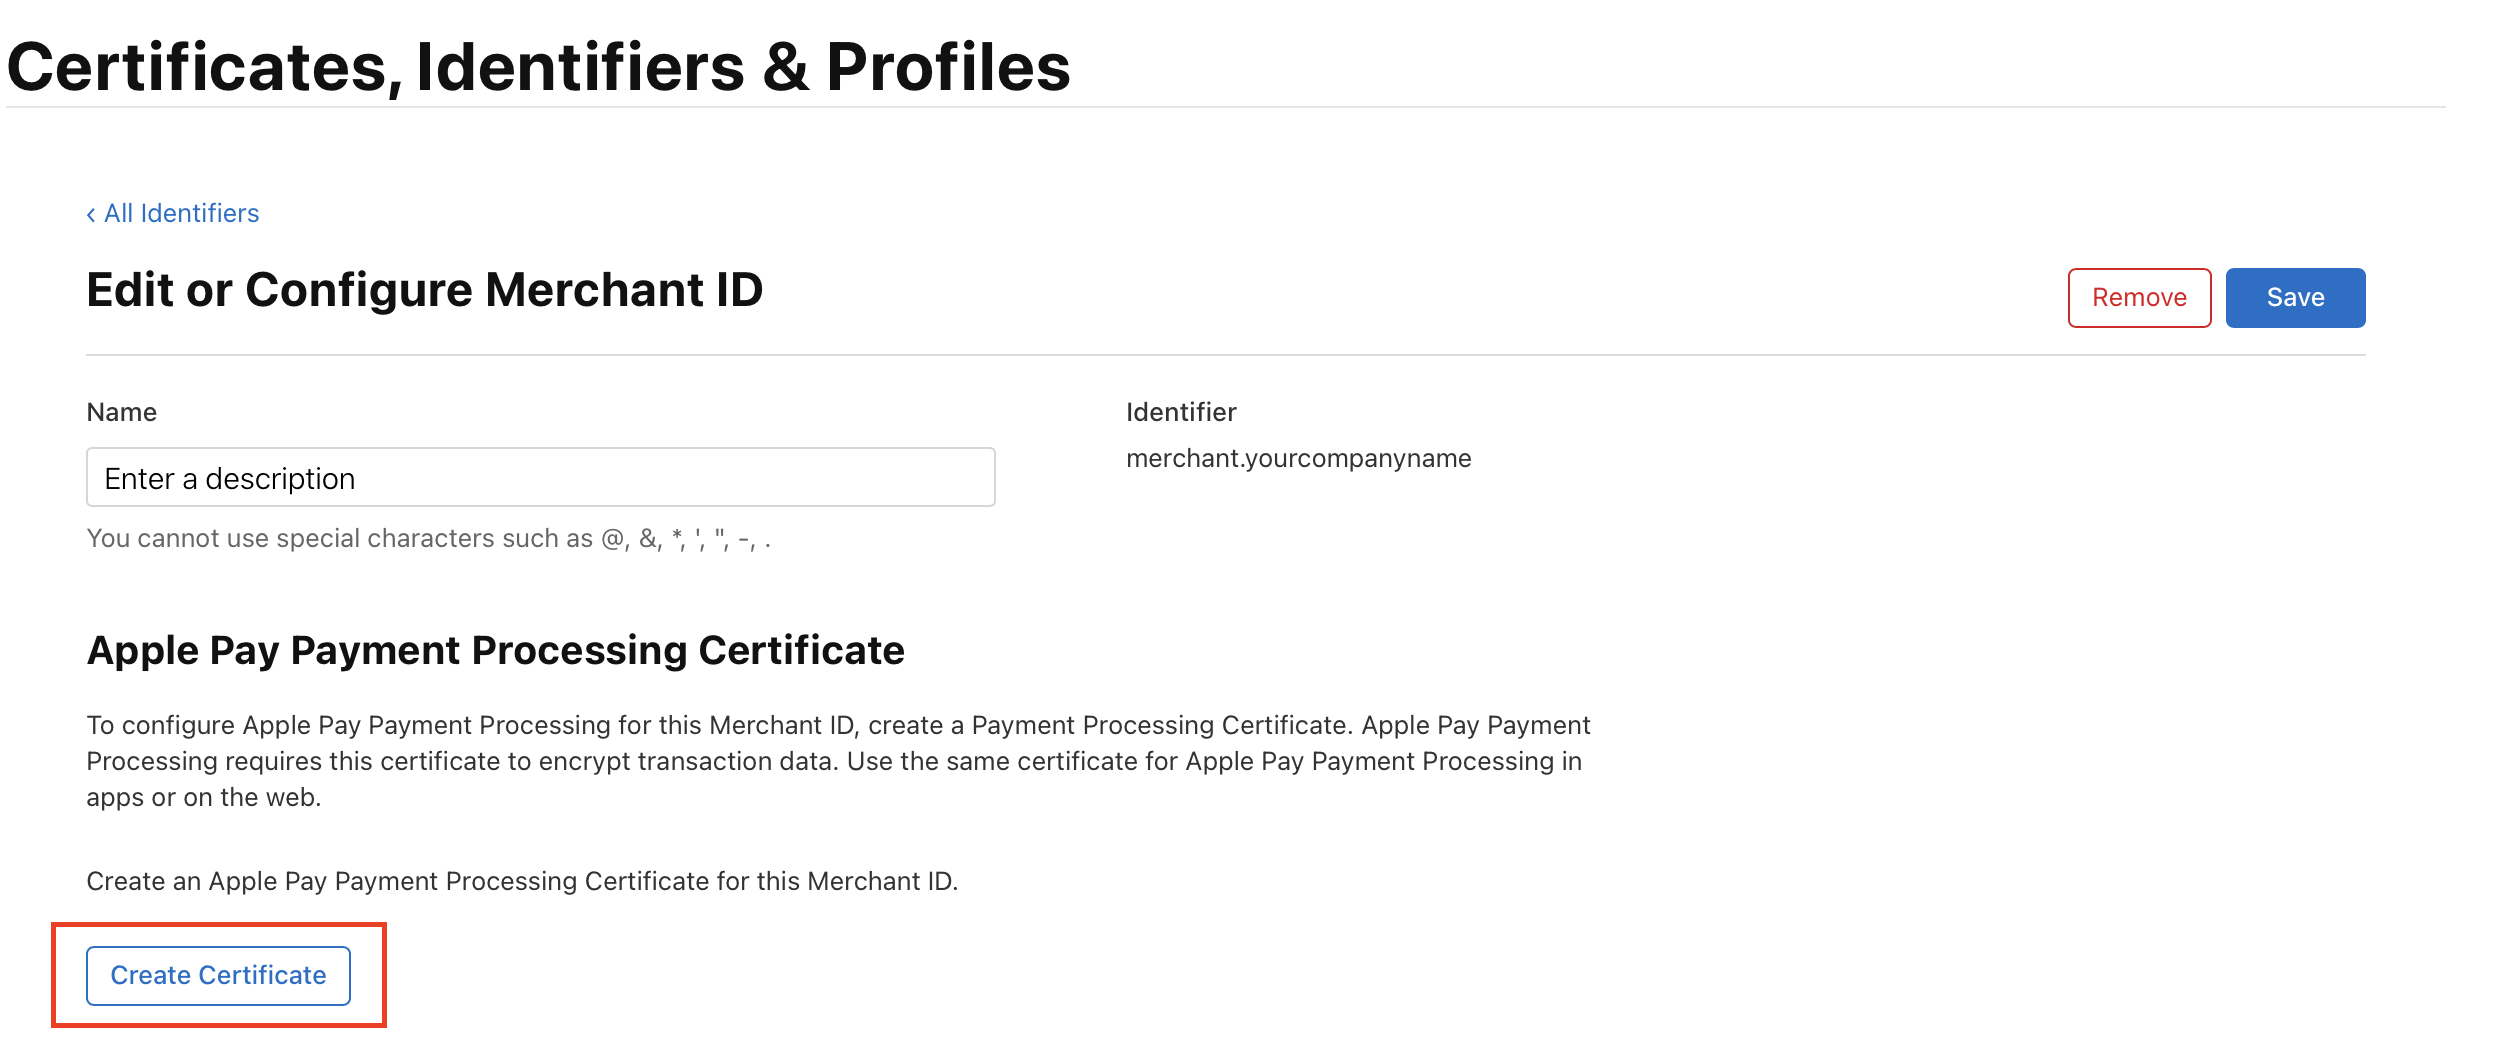
- From your newly created Merchant ID, click Edit.
- Locate the Apple Pay Payment Processing Certificate section and click Create Certificate.
- Download the Certificate Signing Request (CSR) file from your MPGS account.
- Upload this CSR file to your Apple Developer account.
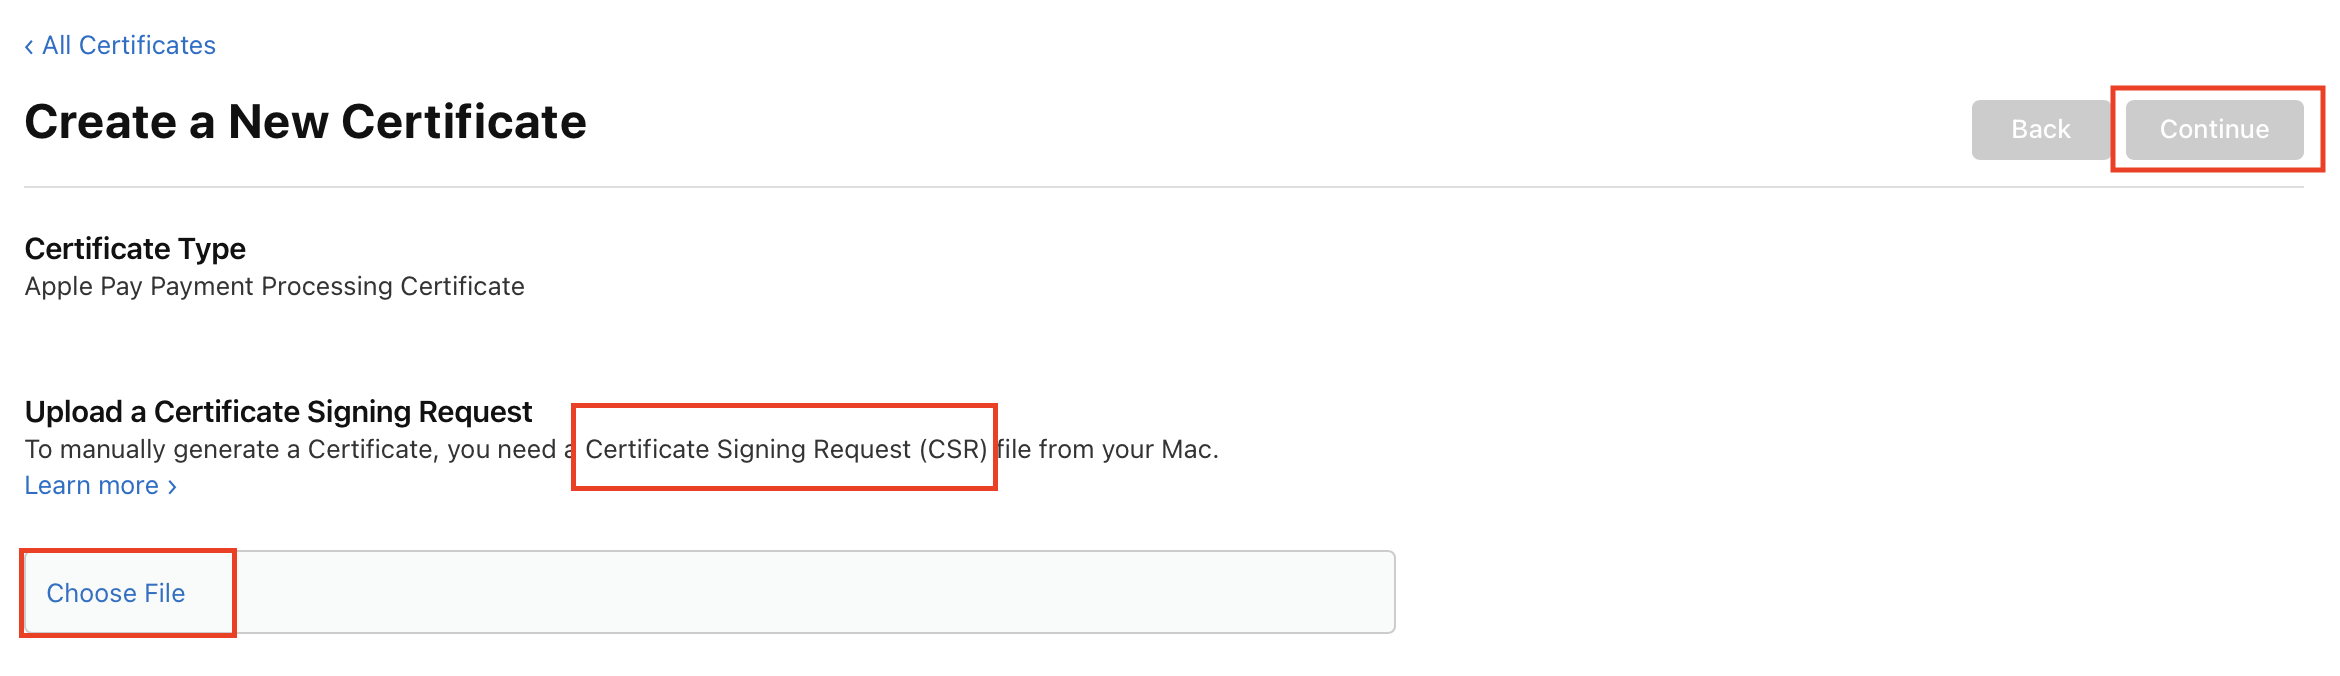
- Download the generated Apple Pay Payment Processing Certificate (a
.cerfile) from Apple.
MPGS Users - Essential Step: For MPGS accounts, it is imperative to download the Certificate Signing Request (CSR) from the Device Payment section within MPGS. This CSR must then be uploaded to your Apple Developer account. Subsequently, download the resulting
.cerfile from Apple and re-upload it to MPGS. This iterative process is critical for correctly associating your Merchant Identifier.
EdfaPay Support: If you do not utilize an MPGS account, EdfaPay will supply the requisite CSR file. Please contact our Technical Support team at for assistance.
4. Verify Your Merchant Domain
Domain verification is a critical prerequisite for enabling Apple Pay on your website.
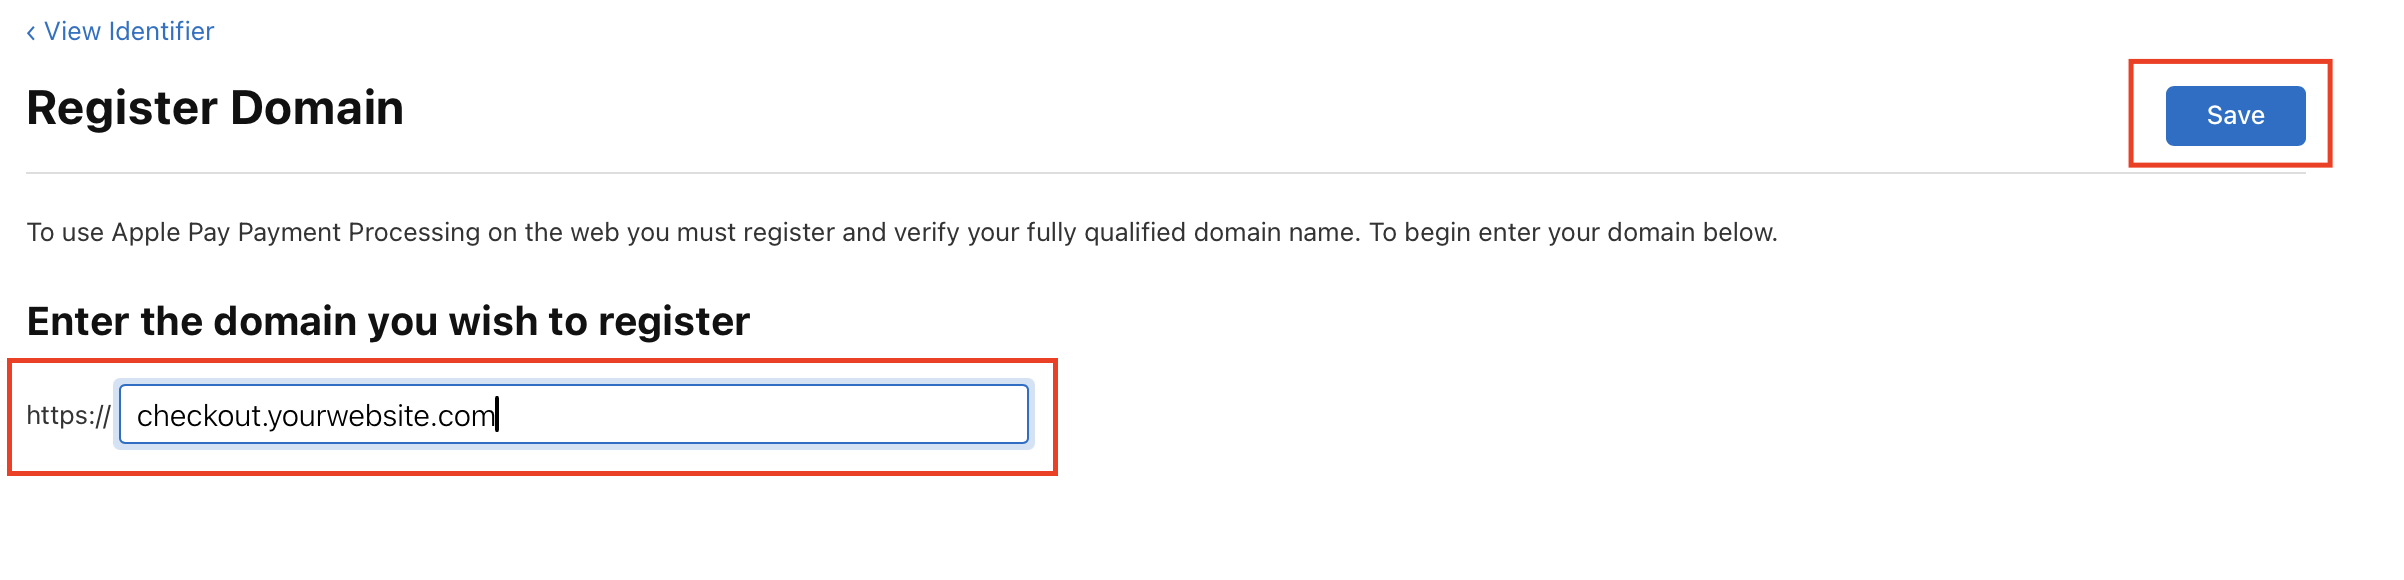
- Click Add Domain.

- Under Domain Verification, enter your production domain (e.g.,
checkout.yourwebsite.com).
- Download the unique verification file provided by Apple.
- Upload this file to the
/.well-known/directory on your server (e.g.,https://yourdomain.com/.well-known/). - Return to Apple Developer and click Verify.
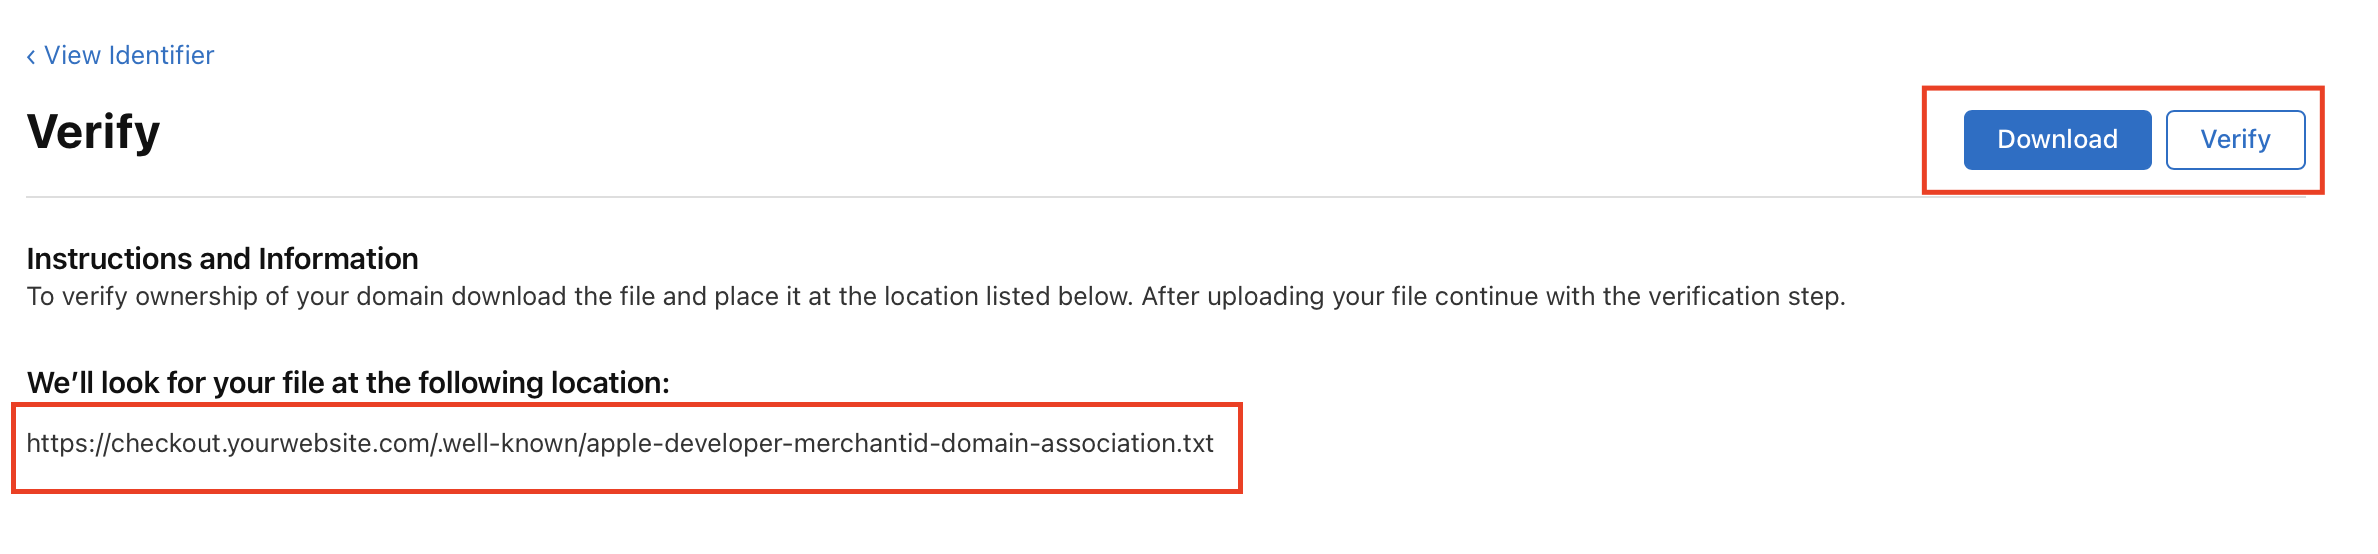
File Placement: Ensure the downloaded
well-knownfile is accurately placed within the specified directory on your server for successful domain verification.
Production Environment Only: Apple Pay domain verification is exclusively supported for production domains and will not function in staging or test environments.
5. Apple Pay Payment Processing on the Web
To enable Apple Pay for web-based transactions using your Merchant ID, it is necessary to register and verify all domains that will process payments. Additionally, an Apple Pay Merchant Identity Certificate must be created to authenticate your web sessions with Apple Pay processing servers.
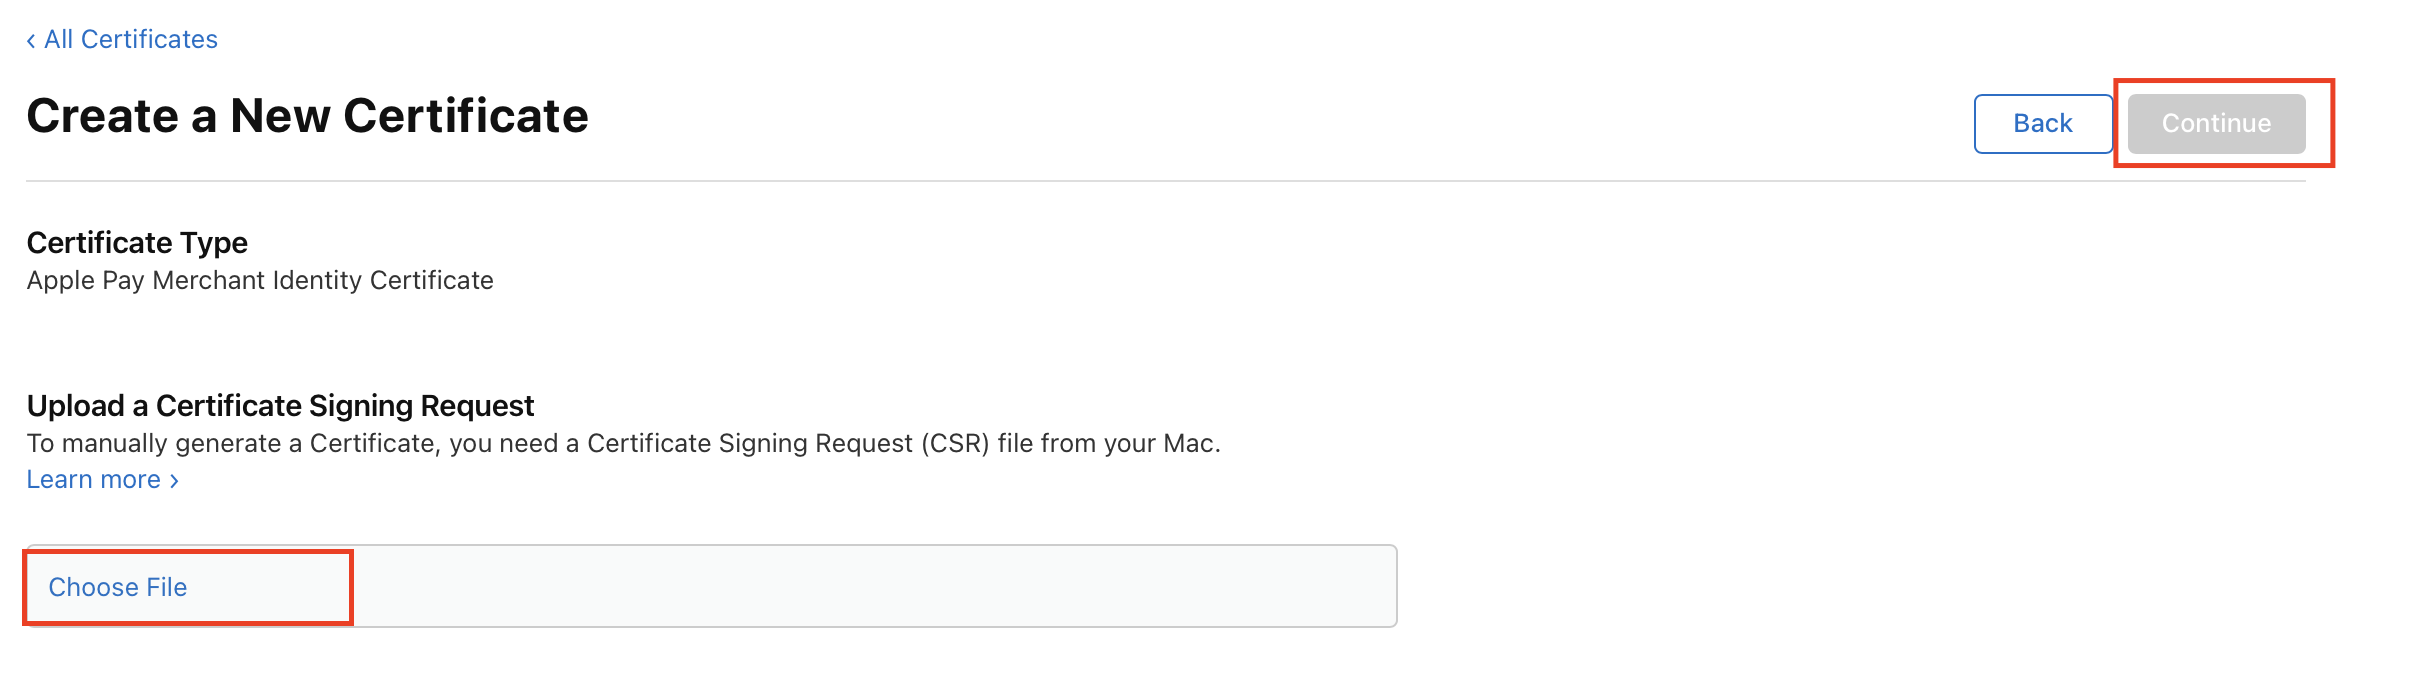
Apple Pay Merchant Identity Certificate Creation
Execute the following steps to generate your Apple Pay Merchant Identity Certificate:
-
Generate a CSR and Key File
Utilize the OpenSSL command below to create your Certificate Signing Request (.csr) and Private Key (.key) files: -
-
Convert the Certificate to PEM Format
After downloading the Apple-issued certificate (.cerfile), convert it to a PEM (.pem) file using this command: -
Create a P12 File
Combine your generated PEM and Key files to create a P12 (.p12) file, a standard format for encapsulating private keys and X.509 certificates:
Action Required: Submission of P12 File to EdfaPay
Upon successful generation of the
.p12file, securely transmit the following details to EdfaPay:
- The generated
.p12file.- The password established for the
.p12file.- Your precise domain name.
- The name of your Apple Pay Merchant Identifier.
This information is indispensable for EdfaPay to finalize the Apple Pay configuration on our payment gateway, thereby ensuring seamless processing of all your Apple Pay transactions.
Important Considerations:
- Ensure that
MerchantNameandyourdomainname.comare replaced with your specific merchant name and domain, respectively.- Verify that filenames within each command precisely correspond to your generated files.
- The
.keyfile must be safeguarded and never disclosed publicly.
Certificate Expiration: Apple Pay certificates are subject to annual expiration. Prompt renewal prior to expiry is crucial to avert any service interruptions for Apple Pay transactions.
Updated 4 months ago