Webhook Configuration
This documentation outlines the essential steps for integrating and leveraging the EdfaPay Webhook Service. Webhooks provide real-time notifications for critical events, ensuring your systems remain synchronized and up-to-date.
Webhook Setup Guide
Follow these steps to configure your webhook endpoint in the EdfaPay Dashboard:
- Log in to your EdfaPay Dashboard
- Navigate to Configuration → Webhook
- Click Add New
- Enter your webhook endpoint URL
- Click Save
- Test your endpoint to ensure it is working correctly
Immediate Update Required for Webhook URLs Upon Environment ChangesReasoning: Transitioning between environments (UAT ➔ Production) or altering domains will invalidate previously configured webhook URLs.
Action: Ensure your webhook URL is promptly updated within the EdfaPay Dashboard to maintain continuous service.
Webhook Configuration
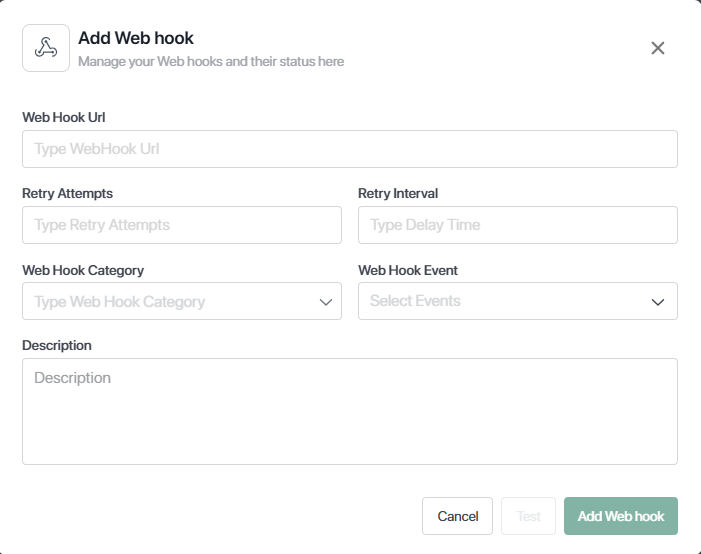
To configure your webhook, you need to provide the following:
- Webhook URL: Public endpoint that receives notifications
- Webhook Category: Defines the group of events
- Webhook Events: Specific triggers sent to your endpoint
Webhook Categories & Events
Transaction
Transaction Created — Payment request initiated
Transaction Approved — Payment processed successfully
Transaction Declined — Payment failed or rejected
Transaction Completed — Final transaction state
Invoice
Invoice Paid — Invoice fully paid
Invoice Partially Paid — Partial payment received
Invoice Expired — Invoice expired
Payment Links
Payment Link Paid — Payment completed
Payment Link Not Paid — Payment not completed
Payment Link Cancelled — Link cancelled
Payment Link Expired — Link expired
Implementation Notes
Best Practices
Always return HTTP 200 OK to acknowledge receipt.
Expect duplicate callbacks and handle them safely.
Use HTTPS and validate incoming requests.
Store transactionId for tracking and reconciliation.
Updated 3 months ago